Knowing how to use tile spacers can give the even greenest of green do-it-yourselfers a chance to look like a real tiling pro. While tile spacers are mere little pieces of plastic, they give your tiling job proper spacing and symmetry, saving you from installing a chaotic piece of abstract art on your backsplash or bathroom floor.
Discover Our Entire Selection of Tiling Tools
Using tile spacers can feel like a perfectly intuitive process—you simply place them at the corners of each piece of tile—but there are some things you should know before diving in.
It is absolutely critical that you pluck up your tile spacers at the right time, which is generally about thirty minutes after you place your tiles into the adhesive. This gives your tile a chance to become set in the adhesive, which won’t have solidified yet to the point that it traps your spacers. You definitely don’t want to wait more than an hour to remove them.
Plucking those spacers—we recommend needle-nose pliers—lets them live on for use in your next tile job, but, more importantly, if you leave them in place and apply grout over traditional tile spacers—some are designed to be kept in place—your grout will undoubtedly crack, marring the whole project.

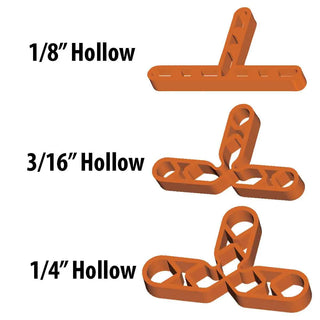
Barwalt Hollow Leave-In T Spacers
So what happens when a tile spacer gets stuck? Even the consummate tiling pro will admit to having let one set too long—okay, maybe he won’t admit it, but he’s done it. If—when—that happens, you just want to give it some light taps on the side with a screwdriver or hammer and awl until it wiggles a touch. At that point, you can just pluck it right up.
You’ll quickly gain confidence with the basics of using tile spacers. On occasion, though, your tile job may call for more intricate work and, for that, you may need tile spacers that allow for a bit more versatility. Of course, we have you covered on that front. You should also be equipped with the proper tile cutter.
Taking a little time to study up before taking on that do-it-yourself tile job can save you all sorts of headaches. Knowing how to use tile spacers is one of the most fundamental parts of tiling. They give you symmetry—truly the mark of professional work—and gaining the skill is a breeze.
Contact Contractor’s Direct for All Your Tiling Needs
If you have questions about tile and what supplies you need for the job, we’re here for you! Reach out to us at 1-800-709-0002.


