
Source: jorgeflorez/Shutterstock.com
A job well-grouted is a job well-done, yet it’s one aspect of tiling we often take for granted. If you’re brand-new to tiling and want to learn how to grout like a master, check out some of our tips below before you get started. We’ll help you find the easiest-to-use grouting tools so your first job goes off without a hitch.
What Is Grout and Why Is It Necessary?
Grout is a powdered spreadable filler—typically made of cement, resin, or epoxy plus sand, lime, and color pigment—that’s mixed with water and spread in between tiles to create a seamless, finished look. The amount of space between tiles, referred to as the “grout joints,” can change the layout and overall finish of the floors or walls. Grout comes in a wide variety of colors to help complement the tile design. Not only does it affect aesthetic, but grout also helps bolster performance. It will help add rigidity and strength while also preventing moisture and dirt from getting stuck beneath the tile.
Shop Our High-Quality Flooring and Tiling Tools
Tips for How to Grout Like a Pro
Choose Grout Carefully – The first step in the process is to choose the right grout for the job. Common types of grout include:
- Sanded grout. Generally used for large grout joints (1/8” or bigger), sanded grout has a sandy consistency and is ideal for floors and walls.
- Unsanded grout. Ideal for small grout joints (1/8” or smaller), unsanded grout is most often used for wall tiling spaced closely together.
- Epoxy grout. Epoxy grout is made of resin and hardener that’s more impervious to moisture, chemicals, and stains. Though more expensive, it’s best for tough environments where chemicals and staining are likely, such as countertops, pool decks, and industrial spaces.
Once you know which type of grout is best for your specific job, it’s time to choose a grout color. Darker hues will keep grout from looking dirty or discolored, while lighter ones will help create that fresh, bright look.
- Have the Right Tools – In addition to a high-quality grout, you’ll also want to be particular about the grouting tools in your toolbox. These tools are crucial to helping you apply grout neatly with minimal waste.
- Grout floats. Among the most essential grouting tools is the grout float, a special tool designed specifically for applying grout.
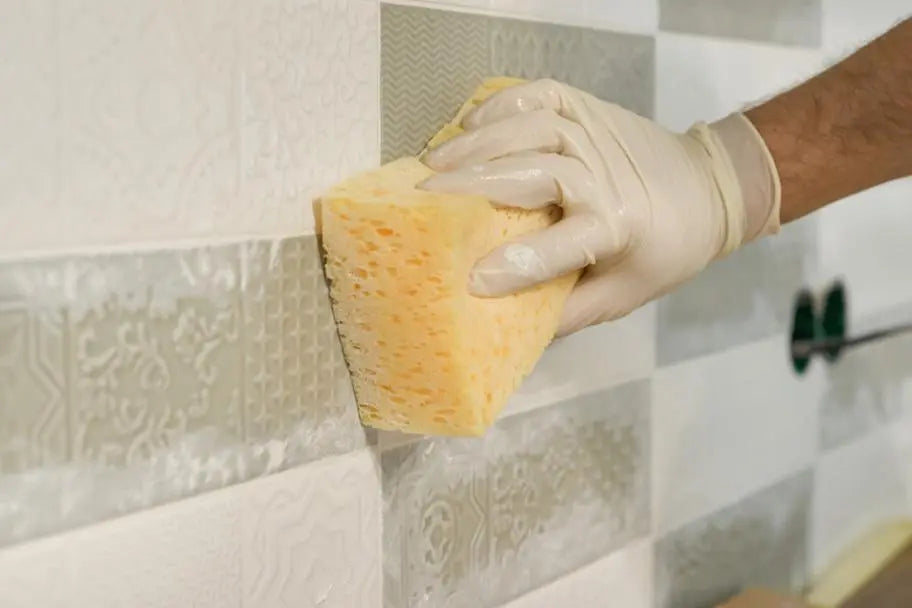
- Grouting sponges. A big part of applying grout is removing the excess from the surface of the tiles, which requires a high-quality hand sponge that removes excess without “digging out” or marring grout.
- Grout cleaning systems. Simplify the entire process with a grout cleaning system that quickly cleans sponges as you go and lengthens their life so you don’t have to constantly buy new ones.
- An acidic cleaner to remove grout haze after the grout has fully dried. This will help create that sparkly, clean look when you’re done.
Source: SimoneN/Shutterstock.com
-
Know How to Do It Right – You’ve got the grout and tools, and now you just need one thing—the know-how to use them like a pro. Here are some simple grouting tips to get you started:
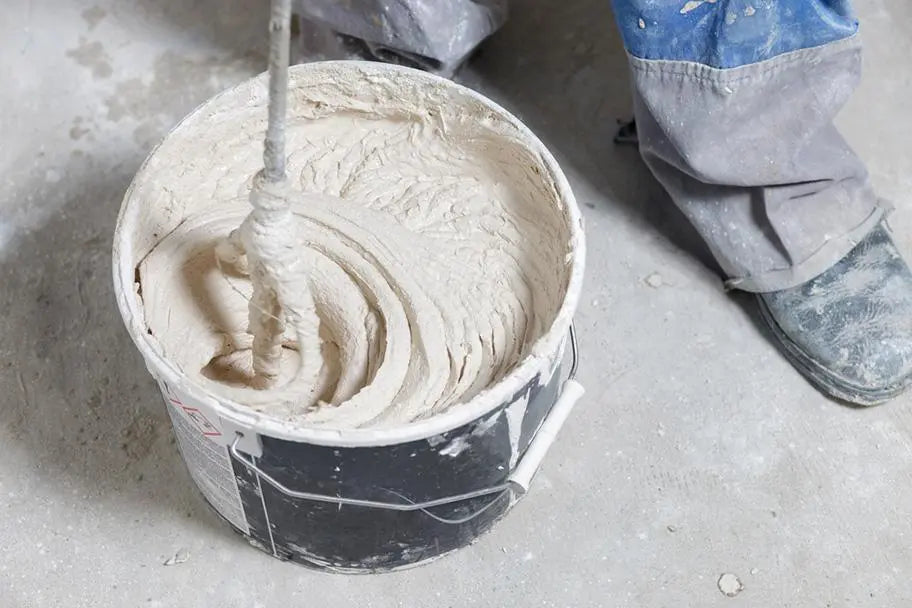
- Mix smart. Make sure you closely follow the manufacturer’s instructions on the bag of grout to mix it properly. Typically, you’re looking for a peanut-butter-like consistency that’s thick but still flows.
- Stash some dry grout aside. We recommend keeping a handful unmixed just in case you need a bit later for touch-ups.
- Get the timing right. Building in enough time for the mortar to set before you grout is crucial to a job well done. However, don’t wait too long after installation to clean excess mortar or it can be really tough to remove.
- Apply it properly. Apply grout to each line at a 45-degree angle—in other words, not straight-on—so you’re filling the gaps evenly without pressing too much into each opening.
- Move quickly. You want to try to hit each wall in one go so that you can then clean it in one go when you’re done.
- Use a clean tub. Try to ensure your tools and supplies are clean and only contain the materials you’re using. If you have a clean tub, for example, you can use it to catch excess grout and reuse it as you go.
Source: VH-Studio/Shutterstock.com
There you have it! As with any skill, you’ll get better at grouting the more you do it. Be patient with yourself as you learn and don’t be afraid to take a few practice stabs in an inconspicuous area of the basement or on an old piece of furniture. Happy grouting!